If you code in Python, the RPi.GPIO Python library (included with Raspbian) lets you configure, read, and write to GPIO pins.
Note: To install the RPi.GPIO Python library, enter this command at a terminal:
If the library’s already installed, you’ll get a “…is already the newest version” message.
Otherwise, the package will download and install.
sudo apt-get install RPi.GPIOIf the library’s already installed, you’ll get a “…is already the newest version” message.
Otherwise, the package will download and install.
We’ve created a Python script that shows how to read and write with the RPi.GPIO library.
-
If you’re using a browser, click here for the script.
-
To download the script to the current directory using a terminal, enter
wget http://developer.opto22.com/downloads/PythonScript.py
Tip:
To print the working directory, enter
To view the script, enter
To print the working directory, enter
pwdTo view the script, enter
more PythonScript.py The comments in the script point out where it:
- Invokes the Python interpreter
- Includes the RPi.GPIO library and sets GPIO as a local name in the script
- Sets the pin-numbering scheme for the script
(TheGPIO.BOARDoption means that that you’re referring to the pins by their physical pin number. To refer to the pins by their GPIO pin number, use theGPIO.BCMoption.) - Configures physical pin number 13 as input.
Note: Physical pin 13 is mapped to rack position 10. - Reads the input point mapped to pin 13 and stores it in a variable.
- Prints the point’s value to the terminal.
- Configures physical pin number 15 as output.
Note: Physical pin 15 is mapped to rack position 11. - Turns On the output point mapped to pin 15.
- Turns Off the output point mapped to pin 15.
The script assumes you have a 16-module rack, an input module in rack position 10, and an output module in position 11. The script uses physical pin numbers and not GPIO pin numbers or I/O module rack positions, but you can edit the script to use GPIO pin numbers.
To run the script:
- If necessary, modify the pin numbers in the script to correspond to I/O modules on your rack.
- Make the script executable by entering
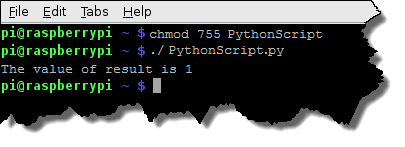
chmod 755 PythonScript.py - Run the script by entering
./PythonScript.py
The output looks something like this: