Overview
If you’re new to Node-RED but have not yet worked through the Hello, world! example, please do so now.
In this section, we’ll add a groov View Read node, configure the groov View project and address, and run the flow.
Step 1 - Add a groov View Read Node
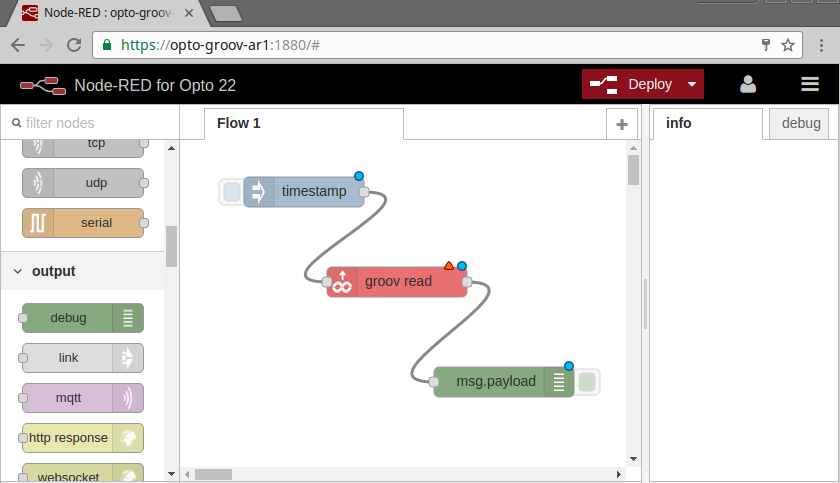
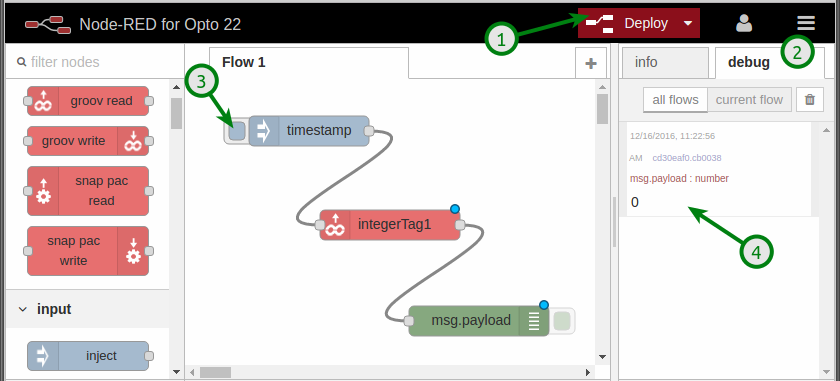
- Drag out an Inject node, a groov View Read node, and a Debug node.
- Wire them together, as shown below.
Step 2 - Configure the groov View Data Store and Project
The groov View nodes have two items that must be configured: one is for the groov View project and the other is for the Data Store device. They only need to be configured once, and are then shared between the read and write nodes.
Configure the Project
To configure a groov View project in Node-RED, we need to click through a Read or Write node and the Data Store configuration view.
To get to the project configuration view:
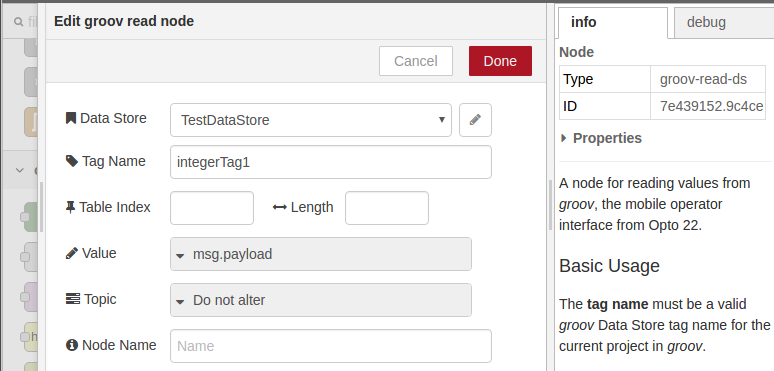
- Double-click on the groov View Read node to open the “Edit groov read node” view.
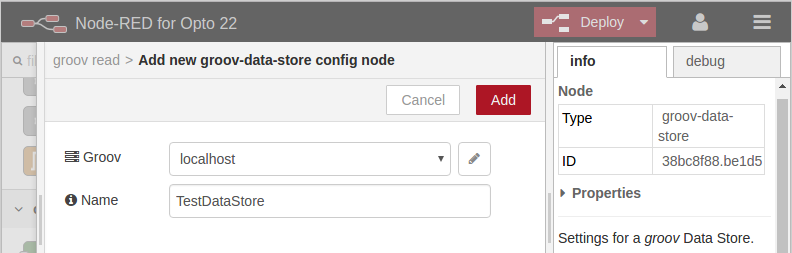
- Click the pencil icon next to Data Store to open the “Add new groov-data-store config node” view.
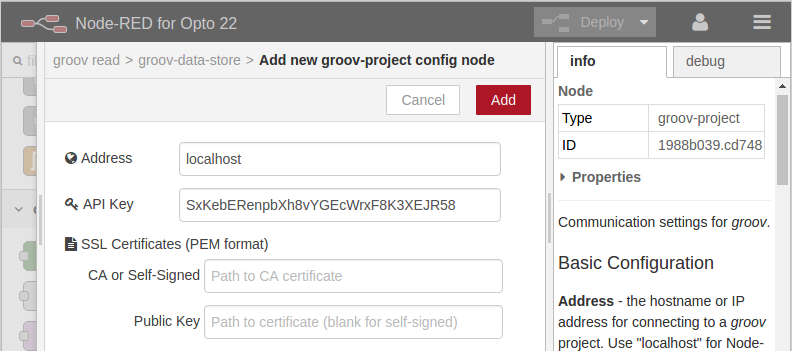
- Click the pencil icon next to Groov Project to open the “Add new groov-project config node” view.
To configure the groov project:
- For the Groov Address fields, enter the hostname or IP address of the controller.
- If using Node-RED and groov on the same device (such as a groov EPIC processor or groov Edge Appliance), then enter “localhost” for the address.
- Do not include HTTPS:// as a part of the address.
- For the API Key field, enter a valid API key from the groov View project.
-
Configure the SSL Certificates fields.
Note: This step should be skipped if you’re using groov and Node-RED on the same device or computer, such as a groov EPIC processor or groov Edge Appliance. In that case, make sure you’re using “localhost” for groov’s address and do not enter anything for the certificates.If groov View and Node-RED are on different devices, then you must configure Node-RED to use groov View’s public key SSL certificate.
Important: The certificate files need to be on the same groov device or the same computer as the Node-RED installation, as it will open the certificate file directly from the file system.- If using a self-signed certificate, then enter the certificate’s filename or full path in the “CA or Self-Signed” field.
- If using a groov EPIC processor or groov Edge Appliance, just enter the filename of a certificate you uploaded using groov Manage or Node-RED Admin.
- If using Node-RED on a computer, enter the path and filename of a certificate on the same computer.
- If using a CA-signed certificate, then enter the CA’s certificate’s filename or full path in the “CA or Self-Signed” field and groov’s public key in the “Public Key” field.
- If using a groov EPIC processor or groov Edge Appliance, just enter the filenames of the certificates you uploaded using groov Manage or Node-RED Admin.
- If using Node-RED on a computer, enter the path and filenames of the certificates on the same computer.
- If using a self-signed certificate, then enter the certificate’s filename or full path in the “CA or Self-Signed” field.
- Click Add to return to the “Add new groov-data-store config node” view.
To configure the Data Store:
- In the Data Store Name field, enter the exact name of a Data Store from the groov project.
- Click Done to return to the “Edit groov read node” view.
To configure the Read node:
- For the Tag Name field, enter a valid Data Store tag name from the groov project.
- Click Done.
Step 3 - Deploy and Run
- Click Deploy.
- Make sure the Debug tab is viewable in the right-hand sidebar.
- Click the Inject node’s button.
- The Debug tab should show a new message with the current value of the Data Store tag.
If that worked for you, then your Node-RED installation is successfully communicating with your groov project!
Next Step
Continue on to reading Data Store tags.